Demystifying the math and implementation of Convolutions: Part I.
A deep dive into convolutions, how they work and how to implement them in python.
Introduction
Worry not, if you want to implement a feed forward convolution layer, (back prop will be discussed in another post), you’ve come to the right place. CNN are able to automatically extract features from images, even when no classification layer is provided (Fully Convolutional Network). The basis of these networks are the so called convolution operator, which we will implement once we understand how they work!
Simple Convolution
I will explain Convolution via some diagrams, gifs and mathematical formulas, giving you some intuition on how it works on a very simple example, generalizing the problem into a mathematical formula and implement it in python, YAY!
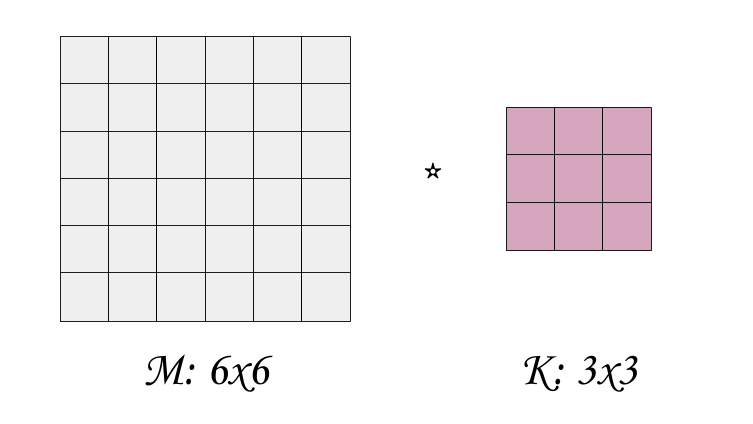
So, given a Matrix M and a Kernel K, we denote the convolution operator Conv(M, K) as M * K.
So, how do we calculate this convolution? We treat the filter K as a sliding window over the matrix M, sliding it over rows then columns from the top left side to the bottom right side, as in the gifs below:

Next, we multiply each element of the highlighted sub-matrix M and the filter K, then we sum all the elements together. One good way to think of this operation, is to treat both the sub-matrix of M and K as vectors, and the convolution operator as the dot product of these two vectors. This way of thinking is highly effective especially when you are trying to implement this. Now, let’s add some values and perform the math

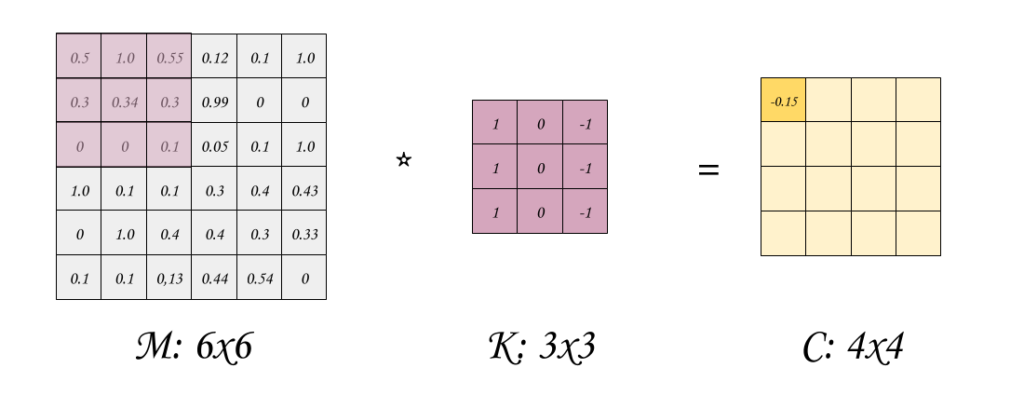
So, we did the first iteration, if you wonder why is the output shape 4 by 4, it is because we can slide this filter through rows up to by 4 and through columns up to by four as well. In this example we slide by 1 pixel through each axis, but this is a hyper-paramter, called the stride.
The formula for output shape given a Matrix m*n and a filter m’n’ using a stride sxsy (sx: stride over rows, sy: stride of columns)
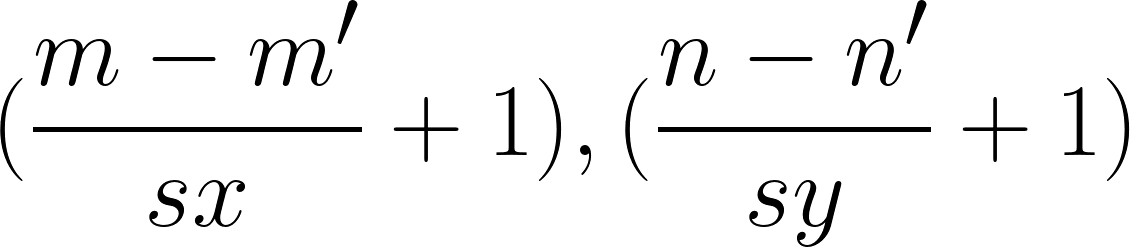 (Eq 1: Output shape of the convolution)
Back to the convolution calculation, now we slide the window to the left and do the same thing, until the entire matrix is exhausted.
Convolution Formula & Implementation
Now, it’s time to formulate our equations to implement it later on. Given a Matrix M of shape m*n and a filter K of shape m’*n’ and an output matrix C of shape m’'n’’ (respecting the previous equation), and a stride of sxsy, here is the output:
 (Eq 2: Computing the convolution operation, where i and j are indexes that respects the shape of the convolution output as in Eq. 1.)
Intuitions
So, as you saw on the notebook, convolutions does help in extracting different shapes and curves in the image. CNN does use this concept to generate features. The features are the kernels used for convolutions, where CNN is able to learn a lot filters for various objects, i.e filters that give positive energy for various objects, for example wheels tends to be round while Car’s plate tends to be a rectangle. CNN will learn various filter, and each object that responds with a high energy when applied convolution to, it is an objects that fits very well into that mask and the fully connected part of CNN is to learn the mapping from objects to classes.
End of Part I
I hope this post has been informative, make sure to check the next part and also my github profile where I do post some notes, notebooks and awesome projects.
Articles written in this blog are my own opinions and do not reflect the views of my employer. Content on this website is original unless mentioned otherwise. Original content is licensed under a CC BY 4.0 Deed. Some of the content might have been preprocessed by AI for clarity and articulation.